Uncategorized

Shingles, Flooring, and more

Sam and I on the nearly finished roof of our chicken coop

Suffice it to say that I knew nothing about shingling a roof, absolutely nothing. I had to learn it all from youtube videos and asking questions. Luckily, it wasn’t exactly hard per se, but it was difficult, sweaty work. Also, I’m not particularly afraid of heights, but it did take a certain act of will to make myself go up to the peak, and in the end my son enjoyed that part more so I showed him what I had so recently learned and we shingled the roof together. Don’t tell our dog that we co-opted his snack bag to hold roofing nails!

A very cool thing was that I found out you can get hooked blades for a basic utility knife that cut shingles and linoleum. Invaluable!

Meanwhile, the first three chicks we had bought back in May were growing quickly and we needed to get them out of their brooder box and into their new home. In order for that to happen, I needed to finish what I began calling their first floor apartment. Installing linoleum was another thing I didn’t know much about, but in the end it wasn’t that different from making a clamshell portfolio. You measure and cut the linoleum to size, than glue it down. Only this was more forgiving, because the chickens don’t object much to imperfections that would ruin a portfolio for a suite of prints.

Sam inspecting the floor joists

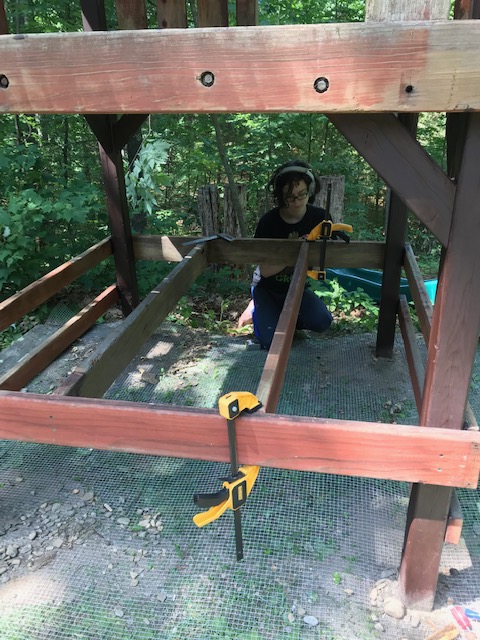
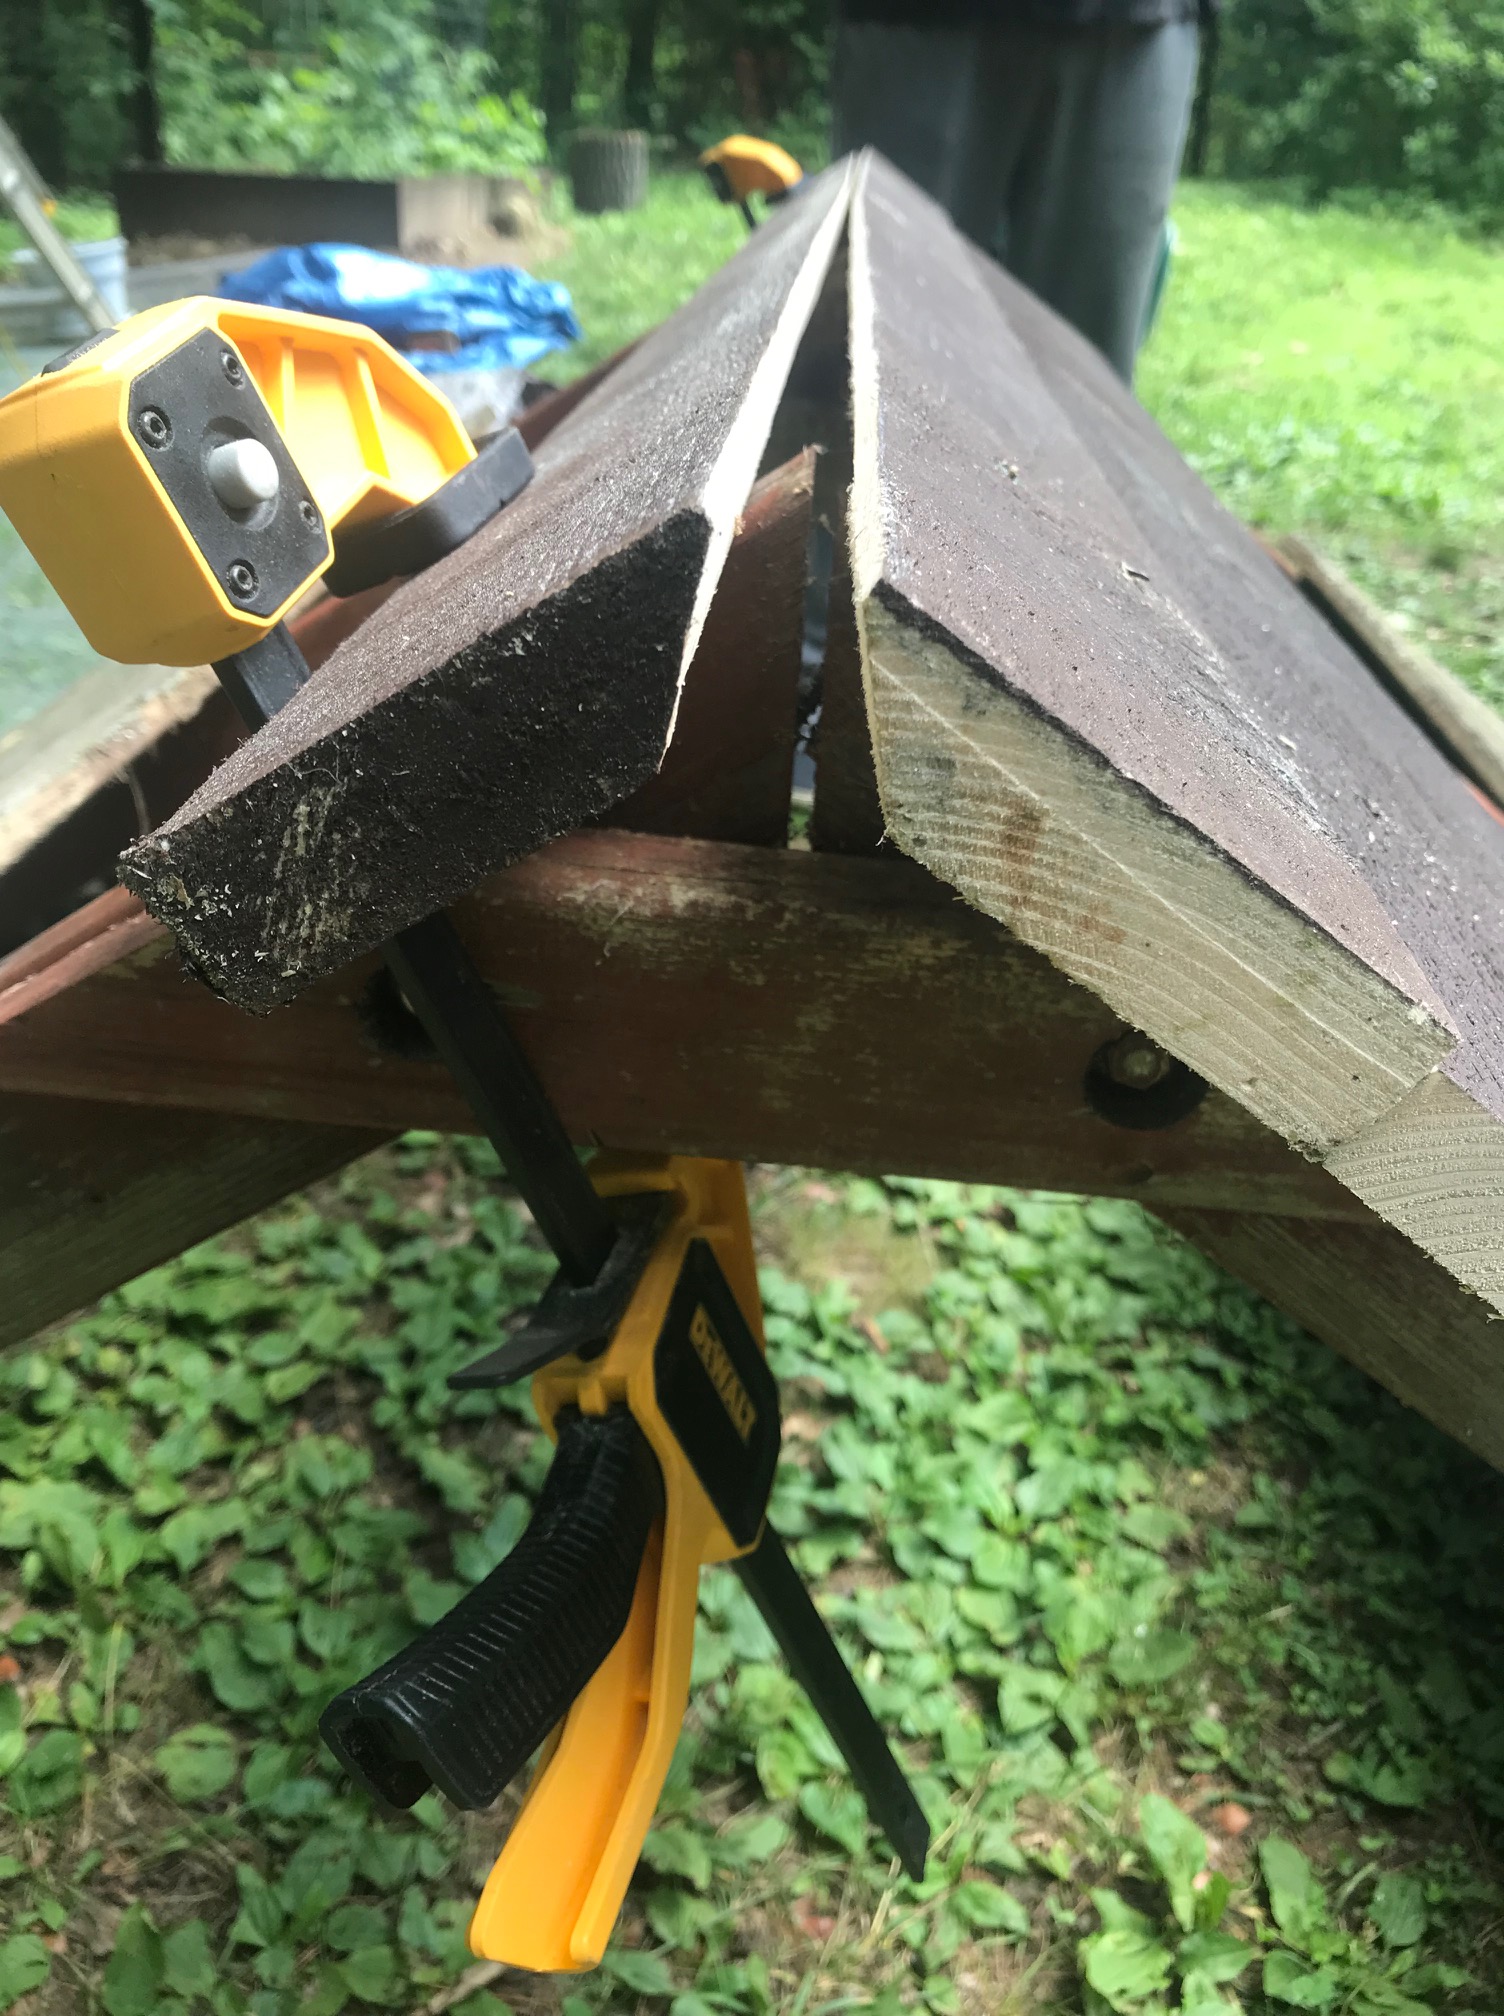
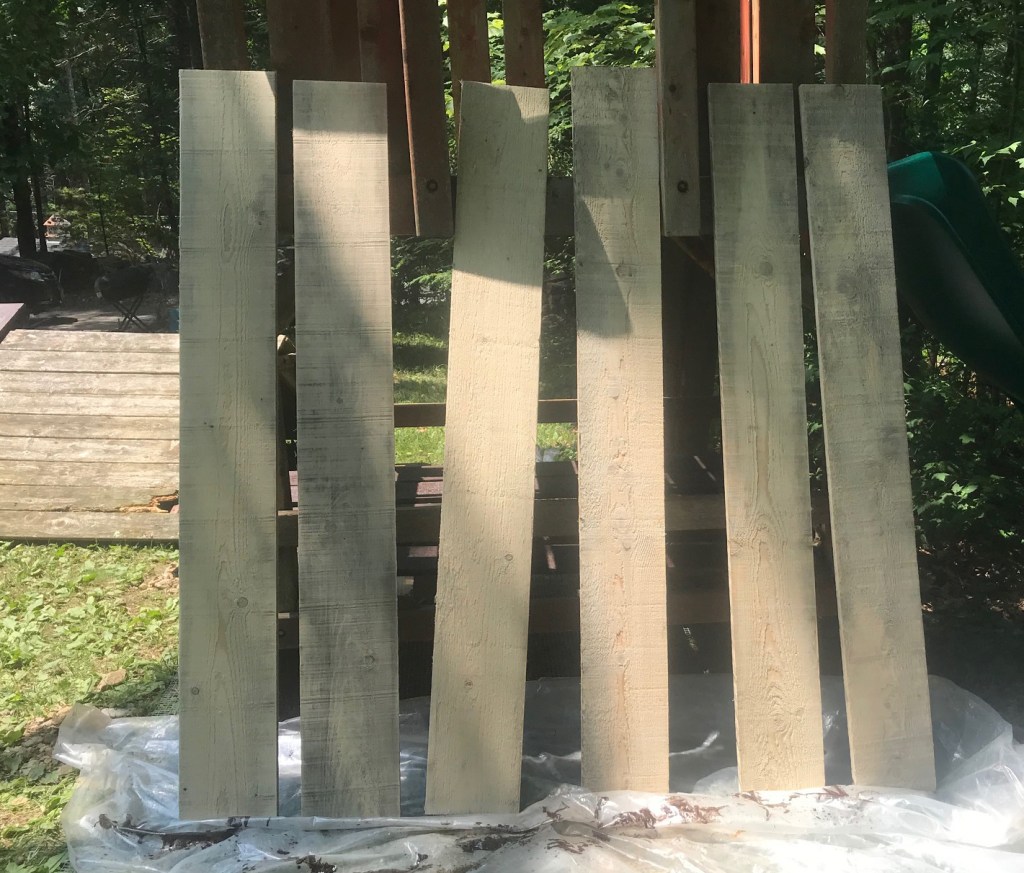
By now I’m starting to get very interested in re-using as much material as possible. The original playset had a picnic table on the lower level that I dismantled and reused for the first floor floorboards. But first we need joists to support them, which came from the original structure as well.

These boards were sanded and stained before install

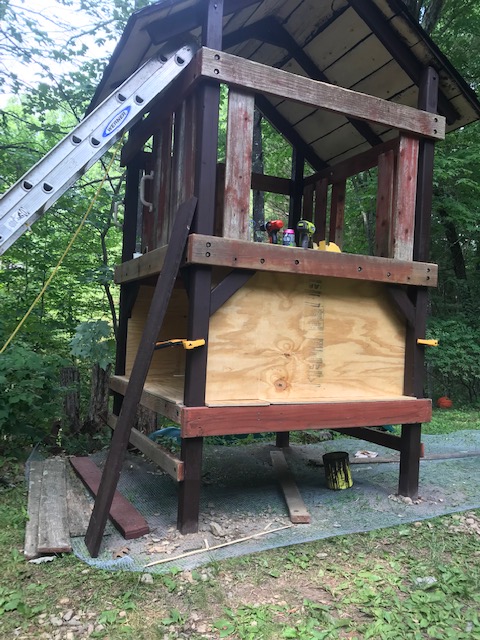
The apartment needed walls as well, and for this I cut down 4X8 foot sheets of plywood to size, being careful to sketch it out and make the best use of the plywood. In the Spring you could get plywood sheets for under $20, but by August they were $30 and up.

First floor apartment of our coop

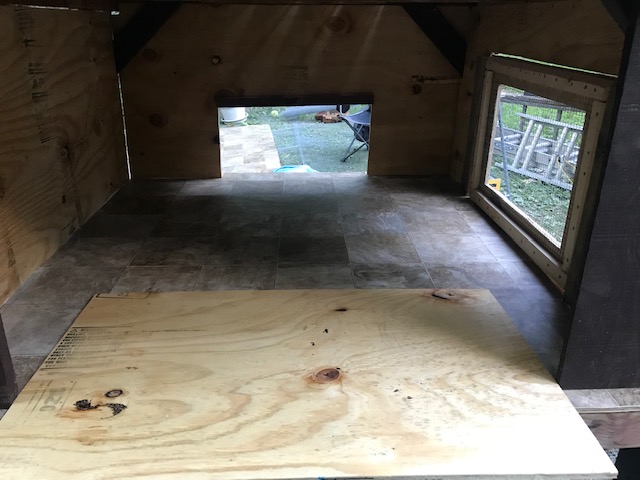
I wanted linoleum floors for ease of cleaning later, and the linoleum was pretty reasonably priced, although I did have to buy more adhesive than I expected. Now that I’ve had to clean things out a few times, I’m very glad for this extra effort. The doors took some time, and at times it seemed like no matter how carefully I measured, I was forever fixing and finagling things that didn’t quite fit the way I expected.

But I was on deadline- I needed to finish the first floor before I left for an artist residency in Northampton for the last 2 weeks of July.

hinges and a handle for the side door

Gradually I figured out how to make doors that open and close and can be secured.

Inside view of egg laying boxes and front door

I had the first floor apartment ready before it was time to leave for Zea Mays Printmaking in Northamption. It was a bit hard for me to trust the chicken care to the young people who sleep in most of the summer, but they kept all three safe, fed, and watered while I was away. Meanwhile, I ordered 6 more chicks from Greenfire Farms, 4 55 flower hens and 2 cream legbars. I had my work cut out for me to finish up the 2nd floor and run before they arrived on September 1st. We were also planning to head to Gloucester for a few days at the end of the month so I would have about 3 weeks when I got back from the residency.

Patty, Silver laced wyandotte

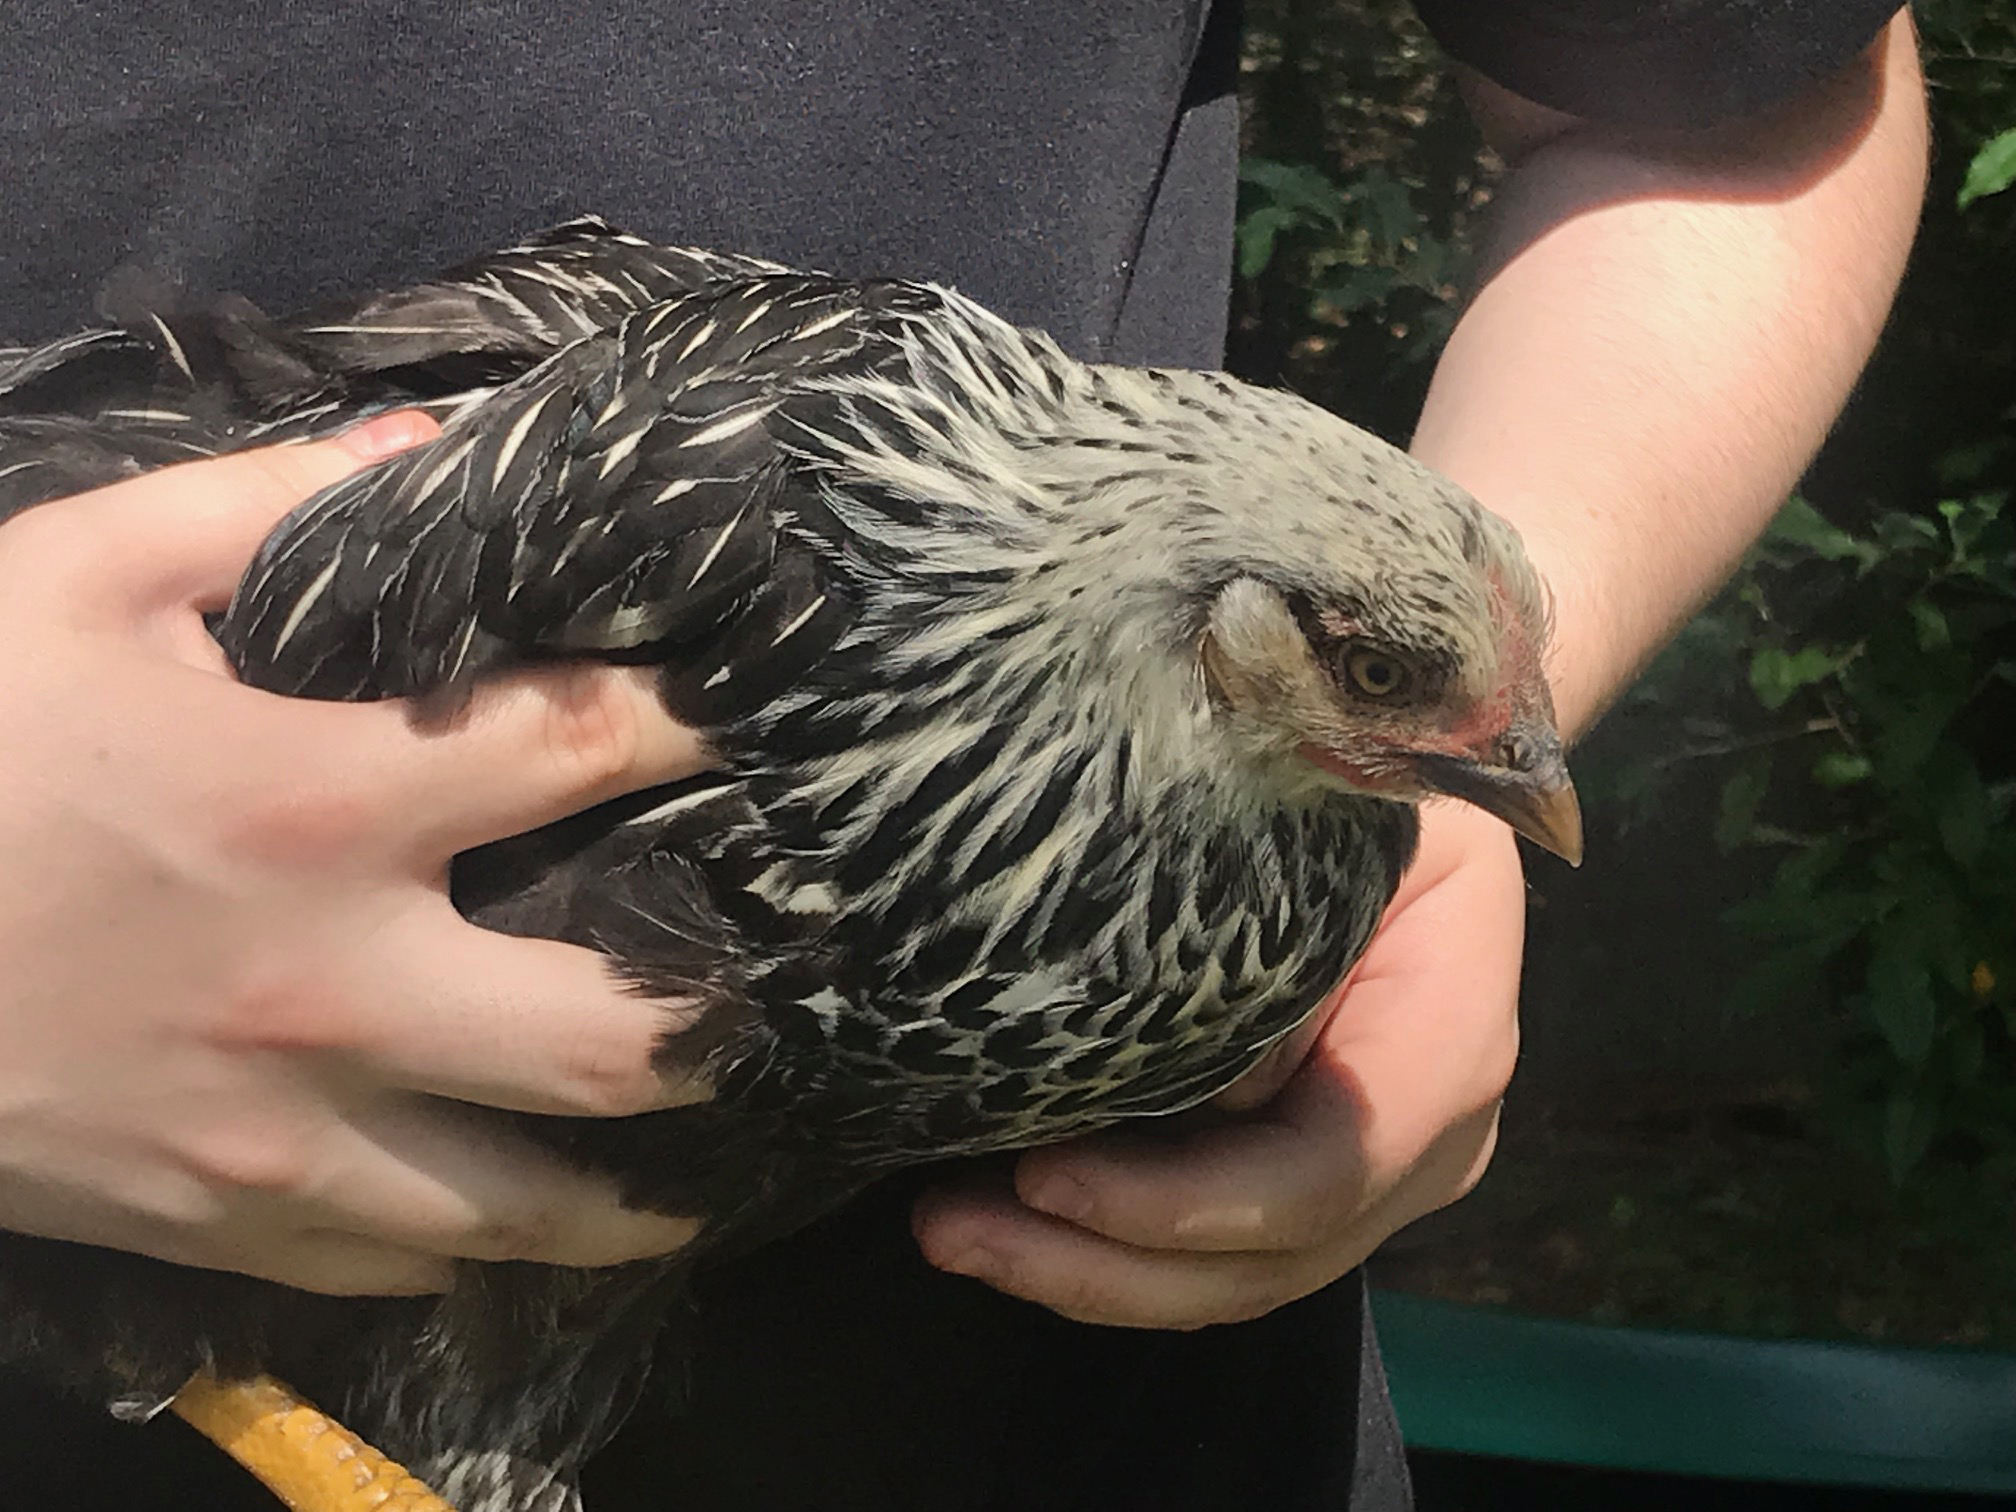
As you can see, she’s not a chick anymore, but she wasn’t laying either at this point, and we had yet to realize that one of our first 3 chicks was not a hen.

Uncategorized

Building a Roof for the Coop

New spruce roof before we shingled it. The other note here is that the original playset had a picnic table on the lower level, but I converted that to a slightly raised up first floor to allow for a shaded space underneath.
The new spruce roof before we shingled it. The other note here is that the original playset had a picnic table on the lower level, but I converted that to a first floor.

As a woman who didn’t grow up building things, lumber yards were unfamiliar territory. It was very confusing, and signage with prices and explanations was often confusing or non-existent. Add to the that the fact that you’re in a place where people might or might not be wearing their masks properly, and this introvert was doing some hyperventilating trying to figure out what to buy.

Sketchbook notes

The sketch above shows some of the math I worked out in the parking lot, occasionally calling into the salesperson inside to ask specific questions about dimensions (remember that in the Summer of 2020 we were in full on pandemic mode). One thing about buying wood is that a 2X4 piece of wood actually measures more like 1 3/4 X 3 1/2 inches, and I needed that figure to calculate how much wood to buy. I settled on rough planed 1X6 inch spruce, which was pretty sweet to work with. I stained it with the same Cordovan oil stain I ended up using on all the wood. Since I wasn’t using much pressure treated wood for multiple reasons, I opted to take the time to stain just about all of my wood on all sides before assembling. This took considerable time, and I also ended up buying a lot more stain that I anticipated, but I’m hoping it will lengthen the life of the coop.

Peak of the new roof with clamp

I bought my first power tool, a circular saw, in the Spring of 2020 in order to build a critique wall for my home studio. I used it a lot for making a coop. I’m going to be honest, I’m not a great candidate for power tools. I’ve always been much the absent minded professor type. To counteract this tendency, I am neurotically careful about taking the battery out when I’m done with a cut, and I had to get very strict with myself. If I got too aggravated, it was time for a break.

I bought my first power tool, a circular saw, in the Spring of 2020. I’ve always been a bit absent minded, so to counteract this tendency I am meticulous about removing the battery after pretty much every cut. I also have to notice when I’m getting aggravated, and take breaks lest I get careless.

The roof as it comes together, before we lift it to the top of the coop.

The next step was to figure out how to shingle the roof. I searched around for youtube videos and I found a great one for beginners with Isidro Sandoval here.

Uncategorized

Patty’s home needs a roof

Rough sketch of roof with dimensions and notes on available lumber
Sketch of roof with notes about available lumber and dimensions

I’m used to big box stores where prices and materials are more or less clearly marked. Lately I’ve been searching for local options in an attempt to avoid the big box stores (and their sketchy politics), but I’m often intimidated by the layout and lack of information in such stores. The roof of the playset had more rot than I expected. Each board was 1X6X48 inches. I also wanted to increase the overhang of the roof to keep our birds dry.

So here’s the thing about a project like this- I seem to spend as much time on the planning, designing, and sourcing of materials as I do on the building part. Making art is similar- often you spend more time thinking and planning than making. The making, truth be told, is generally the fun part.

I could have saved about half the wood of the roof and bought 1X6 lumber to replace the rot, but that wouldn’t have allowed me to increase the overhang. I could have used plywood, but I just didn’t want to. I’m not against it, but it does have chemicals in it that limit its long term usefulness as a material. I guess it bothers me that you can’t even safely burn it after it’s usefulness as a building material has run out.

I didn’t see any interesting alternatives at a nearby big box store, so I went to a local lumber store that had been recommended to me.

Did I mention that I’m an introvert? So a brand new store with unknown layout and rules (remember it’s the Covid 19 era as well) gives me pause. I sat in my minivan for a few long minutes before heading on in. Immediately it’s clear that all the wood is out back somewhere. There aren’t any good signs to tell me where and how to find it. The woman who answers my questions is nice enough, but it’s clear that that none of it is labeled for the novice consumer, or priced, and I will just have to ask. I looked around some more and retreated to my car.

So I’m literally in my van with my sketchbook, and I call. What do you have that might work for the project I’m making? The person on the phone is marvelous considering, and I have to call back a few times as he measures the actual size of the wood he has in stock, and I check my math. Because here’s another thing for the unsuspecting novice- a 2X4 piece of wood (why oh why are we still using the English measurement system?) does not actually measure 2 inches by 4 inches. It’s usually closer to 1 3/4 X 3 1/2 inches. So you have to take into account the actual measurements of the wood.

6 raw boards, sanded and ready to stain

They had 1X8X16 rough spruce. Not a material I’m familiar with, but I was intrigued- could I make that work? I did the math and figured it it was actually pretty perfect, that if they cut each piece into 3 even pieces 5’4″ each (the van holds a 4X8 board but 16 feet is too long), I could get enough wood if I bought 5 16′ lengths, and bought 6 just in case which turned out to be helpful. That would increase my overhang by several inches lengthwise and about 2 inches longer on each side.

After buying the wood, which necessitated a trip inside, I was told to drive around back. Vague directions, very little signage. I hate that- can you tell I hate that? But I found the right person, who looked a little confused but he found and cut the wood for me. As I’m out there I realize that much of the wood, mine included, is stored outside on the ground. I’m not sure if that’s standard procedure but it doesn’t seem ideal, so even as I’m waiting for it to be cut I’m having this buyer’s remorse, second guessing all of my decisions. In the end I spent $100 on the wood for the roof, which is a bit more than plywood would have been but I feel better about it. My point here is that hardware stores and lumber yards, which are traditionally male spaces although that’s changing, are intimidating if you’re not in the know. Better signage and labeling would help that. This is where the big box stores get it right- making it easier for those of us who weren’t indoctrinated into this world at a young age to figure out how to navigate.

The wood is fine, but it was dirty and pretty rough. I decided to sand it, not smooth, but just enough to get the dirt off and some of the gray bits. My small ‘mouse’ sander was clearly not up to the task. I was able to borrow a palm sander that was better (thank you Jeffu!). It’s all going to be covered with roofing paper and shingles so it doesn’t have to be beautiful, but I stained one side anyway to give it an extra bit of protection from the elements. I figure I can paint the other side, which will then be the ceiling of the 2nd floor, if I want to. We’ll see.

5 spruce boards, stained dark brown and laid out to dry on the playset
5 spruce boards, stained and drying on the 1st floor of the playset

Next step was to trim all the wood that wasn’t exactly 5’4″ (some were longer). Somewhere along the line I thought, well what if I bevel the edges of the 2 pieces that meet at the peak so that they line up nicely? But cutting 5′ boards with a circular saw at a 45 degree angle lengthwise isn’t all that easy, and my first try was off quite a bit, then my 2nd try went awry (I might have cut through my portable worktable a wee bit) and I got frustrated. I was underestimating where the blade came out underneath, and I also kept forgetting to use the correct guide on the circular saw for the 45 degree cut. It’s not good to get frustrated when working with power tools. My husband noticed and said let’s take the dog for a walk now. So we did.

Came home, 3rd try and I got it right. In the end it’s not that different than cutting a beveled mat, but the tools have more HP and the material is a lot denser and thicker. By the way, I always wear safety glasses and ear protection, and I’ve deliberately cultivated a neurotic habit of pulling the battery out every time I put the saw down. Safety is an extremely important consideration- I need all my fingers thank you very much!

Today’s task- replace the rotted boards with the new boards, trim the top of the 4X4s to match. One had some rot at the top so I’m taking 3 inches off the top of all 4. This is where the frame of the roof screws/is bolted to the structual 4X4s of the playset.

Meanwhile, I’ve ordered the shingles and the roofing nails, and they’re ready to pick up at my nearby box store. Sorry local store! I’ll try again… but I do love the new curbside pick-up option.

Uncategorized

sci 68

sci_68

Barred Owl

All summer long a barred owl hooted outside,

keeping me company during the sleepless times.

Friday morning I found him on Chicopee Row, recently hit.

As I gathered him up,

he opened his eyes one last time,

seeing me.


Later that afternoon-

I took him to his final resting place

on a hill where 3 oak trees grow

together as one.


The silent nights are lonely without his call.


Deborah Santoro

Uncategorized

Chakras Evolve

liquors_3_verticals

I had the pleasure and honor of auditing a printmaking seminar with Phyllis McGibbon at my alma mater last fall.  This allowed me to try lithography for the first time, and to substantially improve my silk screening technique.  More importantly, my ideas and thinking evolved and the LIQUORS & Chakras series took a huge leap.

While I was writing a reflection paper for the class, my husband came up with the idea to put them all together in one image.  The resulting image (above) shows the original 70s era LIQUORS sign in Ayer, Massachusetts, alongside an early gelatin print version of the sign that is about 7 feet tall.  Figure 3 is a hanging mobile made of paper and transparent film, shown here before) and finally the black, white & silver prints in image 4 are my final project for the class, a series of 7 silkscreen prints.

between muladhara and sahasrara

Uncategorized

LIQUORS and Chakras

LIQUORS_Chakra_L-S.jpg

It all started with a 60s era LIQUORS sign in Ayer, Ma. For several years I have been weaving the letters (LIQUORS) in and out of yoga poses and tile patterns in my prints and multimedia pieces. In March I made my first gelatin printed LIQUORS sign, 8 feet tall and 14 inches wide.  And then I made another.  It was interesting that just as I was committing to make prints that I could sell, the first things I actually made were more or less unsaleable prints.

The 7 letters of the LIQUORS sign line up neatly with the 7 chakras, an esoteric system of thinking about the energetic body that emerged in India centuries ago and was imported to the West along with yoga in the 19th century.  The chakras and their associated colors, meanings, and locations continue to evolve in the West.

Chakras are thought to be spinning orbs of energy at various locations in the body.  This concept is useful to yoga practitioners who use them as focal points, a means of concentrating ones mind on the practice.

The LIQUORS sign points to the ubiquity of alcohol in our culture.  Despite the fact that a percentage of the population is always in recovery, our culture values the convenience having alcohol in grocery stores. Imagine for a moment that you are recovering from opioid or alcohol addiction, and yet simply to purchase bread, milk, and eggs, you are obliged to walk past an aisle full of beer and wine.  For most people in recovery, it’s not just one substance, it’s any mind altering substance they can’t have, because one is never enough.

This is the mock up of the sign.  The final version will be fashioned of silkscreen on acetate, laser cut plexiglass, marbled and hand printed papers.  Inside the letters are allusions to places in the body the chakras represent and potential pathways for healing.  There are x-rays, neurons, words, brain imagery, yoga poses, heroin molecules, and more.   The imagery here is evolving as I study the chakras and learn how to heal from grief. A good friend told me that I would have to learn how to incorporate this loss into a new version of myself.  The one thing that’s missing in this sign is my sister- I’m still figuring out how to add her in.

Here it is in my studio, twirling:

LIQUORS_Chakras_twirl


akua, Uncategorized

Coccyx


Coccyx
Coccyx, Silkscreen and monoprint on paper.


This piece iterates an ongoing exploration of the hip joint, the space in and around where the head of the femur sits in the socket of the pelvis known as the acetabulum. The yogi reaches through time when she reaches for a deep bind, exploring layers of tension in the body.  The pose here is pasasana, or noose pose, and is the first pose of the 2nd series of Ashtanga yoga.


Uncategorized

Writing an Artist Statement/ Value Proposition

Molecular Prison

I’m participating in an Artist 2 Work incubator program designed by Professor Ellen Wetmore of UMASS Lowell.  So far we’ve had lectures from professors on value proposition, basic marketing concepts tailored specifically for artists and the art market, branding, and targeting the luxury market.  I’ve learned many new things and relearned things I’ve forgotten that I knew.

Our first homework assignment was to write a value proposition.  She asked for 2 sentences and I wrote a paragraph.  Typical.  Separately from the class I read advice on applying for grants that seemed sound- have 3 people review your grant proposal before you submit it, and include at least one person who does not speak the lingo.  The rationale is that not everyone on the board of folks reviewing your grant will be fluent in art speak, and you need to reach them too.  So I had my husband read my value proposition, and at first I though he just didn’t get it, but by the next morning I realized that I just wasn’t being very clear.

Good advice, that.

Deborah Santoro: The Asana Series

My prints and multi-media pieces inhabit the space between yearning and falling, between striving to realize a potential, and the habits/patterns/programs that enmesh us in ways of being that do not serve our higher selves.  The LIQUORS sign becomes a stand-in for addictions of all kinds, and the hopelessness that trails them. The asana, or yoga poses, represent an embodied, intuitive knowing that links human potential with universal themes; dendrites and star charts, our mitochondria like tiny suns inside our bodies.  In the time bound dance between despair and enlightenment, time, pattern and color all have their part to play.

Uncategorized

Altoon Sultan & Recent Happenings

IMG_7159

I recently went to Wellesley to see the Kathe Kollwitz/ Krieg Cycle exhibit at the Davis Museum & Cultural Center.  I’d write about that, but Altoon Sultan already did that here. While I was in the vicinity, I went to Altoon’s current exhibit at the David Hall Fine Arts Gallery downtown. I went with children, and so didn’t have quite as much time to really look as I would have liked.  It’s a bit distracting when your middle daughter starts rolling around the gallery on a wheeled chair, even if the owner is exceedingly nice and even encouraging.

Still, I have admired her from afar for some time and it was wonderful to see these exquisite little works in person.

IMG_7150

I was also given a large full color catalog with a full length essay about her work, which I will read as soon as I remember where I put it.  It was been that kind of week.  Two weeks, really.  But today I’m back in the studio and it’s been so long since I updated my website/blog, that I’m feeling slightly ashamed.

Not for lack of working, however.  Here is a new piece:

IMG_7143

It’s similar to what I’m working on today, only now it’s a diptych, with more orange.  An interesting confluence, to me at least, is that the way Altoon’s hooked wool rectangles hang from pins on the gallery wall causes them to be not perfectly straight.  The gelatin plates I’m using are the same way, and as they age they become more and more irregular. All in the interest of subverting the tyranny of the rectangle.

The diptych idea popped into my head about a month ago, but it requires a bit of a set-up to line everything up, which I finally did today.

One more thing.  I’ve become hooked on listening to the Modern Art Notes Podcasts while I work.  They had a really interesting one on Picasso’s sculpture at the MoMA, and today I listened to an older one on Marylin Minter and David Ireland.   If you like modern and contemporary art, they are a great way to learn while you work.

http://manpodcast.com